If you have been using Microsoft office suite, then you might be well aware of Microsoft Powerpoint. It’s a presentation program that lets you create slide presentations. There are several things that you can do with this application, and one of these is to function as a simple screen recorder. If you are searching for a way to record your computer screen without installing any extra app, then you can use Microsoft Powerpoint. Microsoft Powerpoint makes it very easy to record your screen in both image and video version.
How To Record Windows 10 Screen Using Microsoft PowerPoint
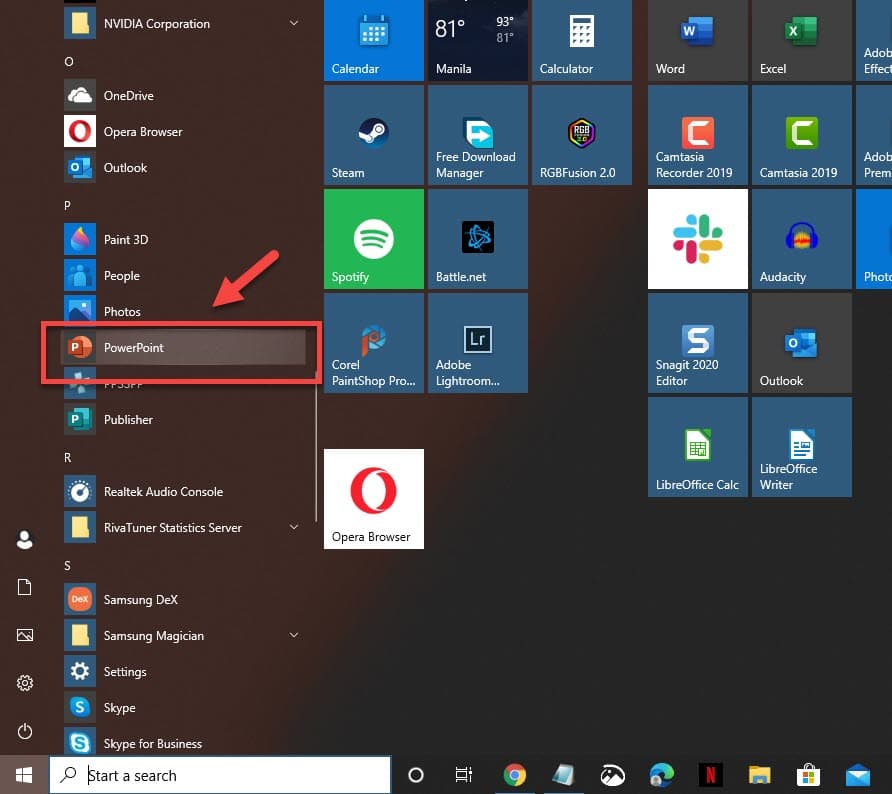
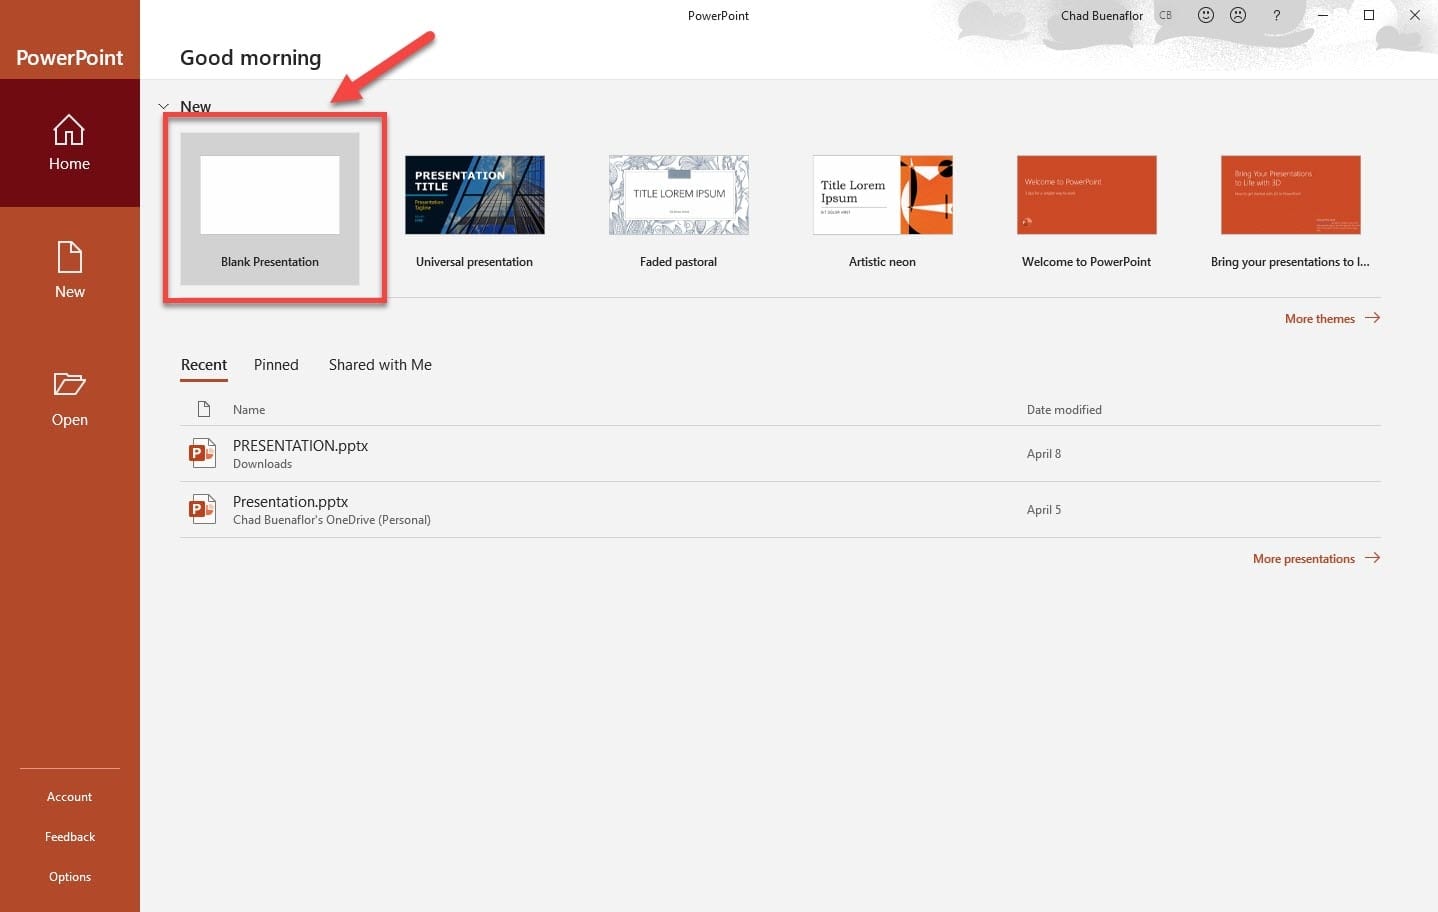
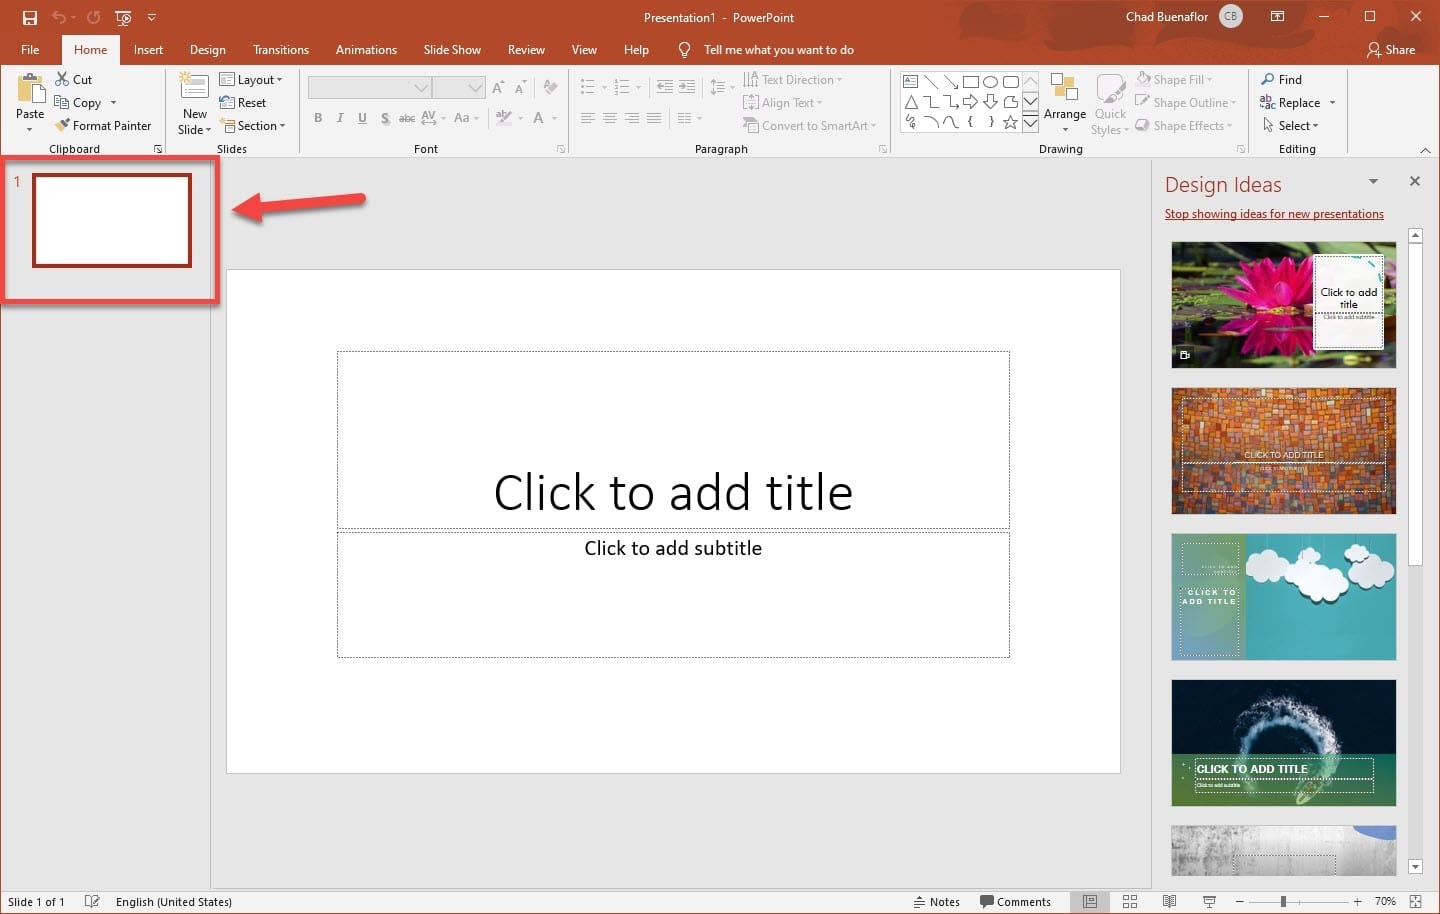
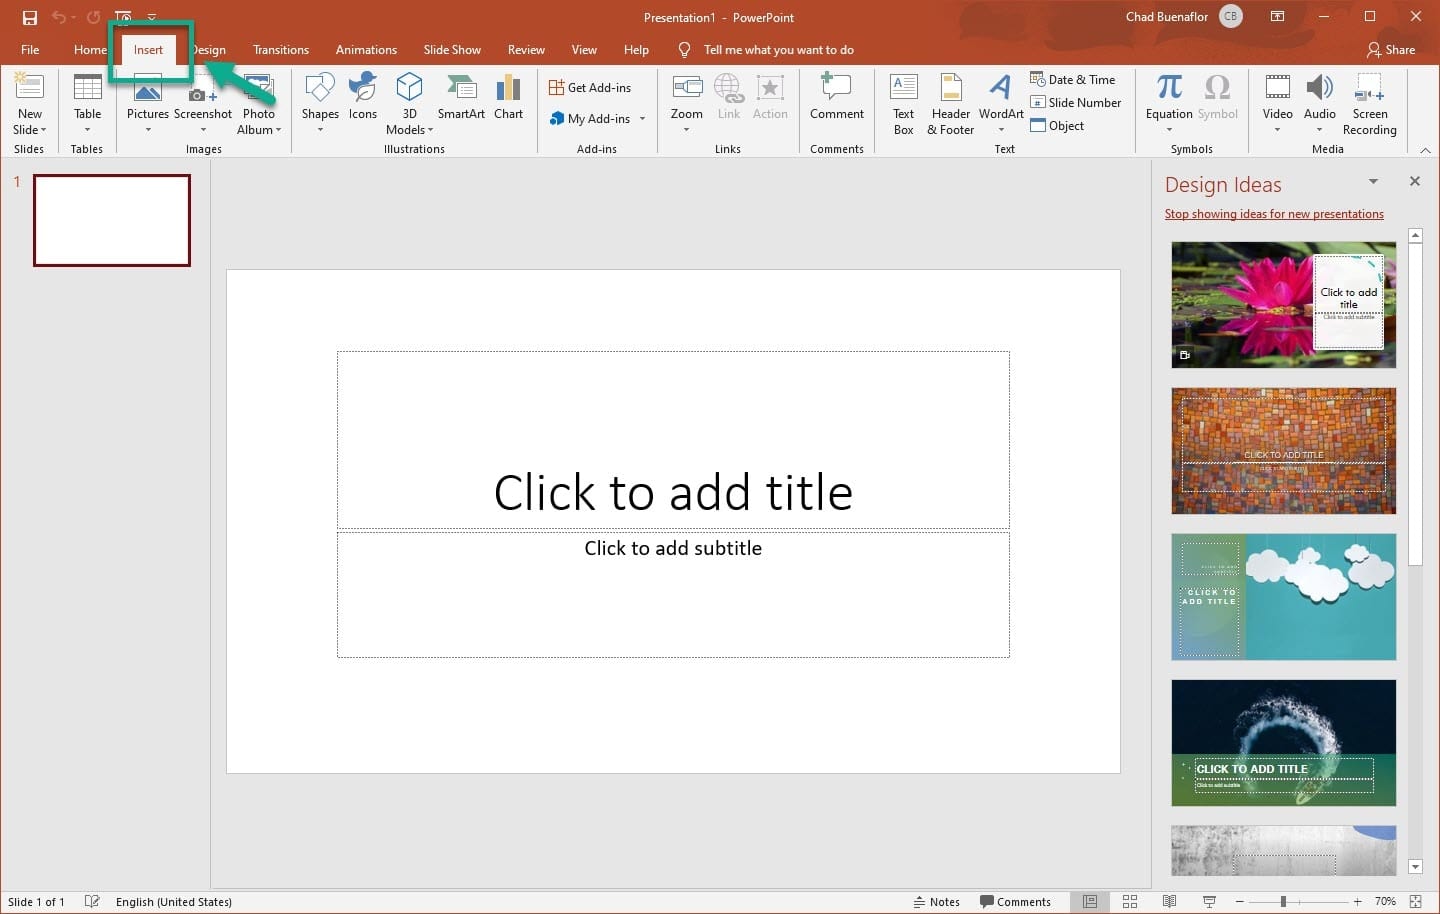
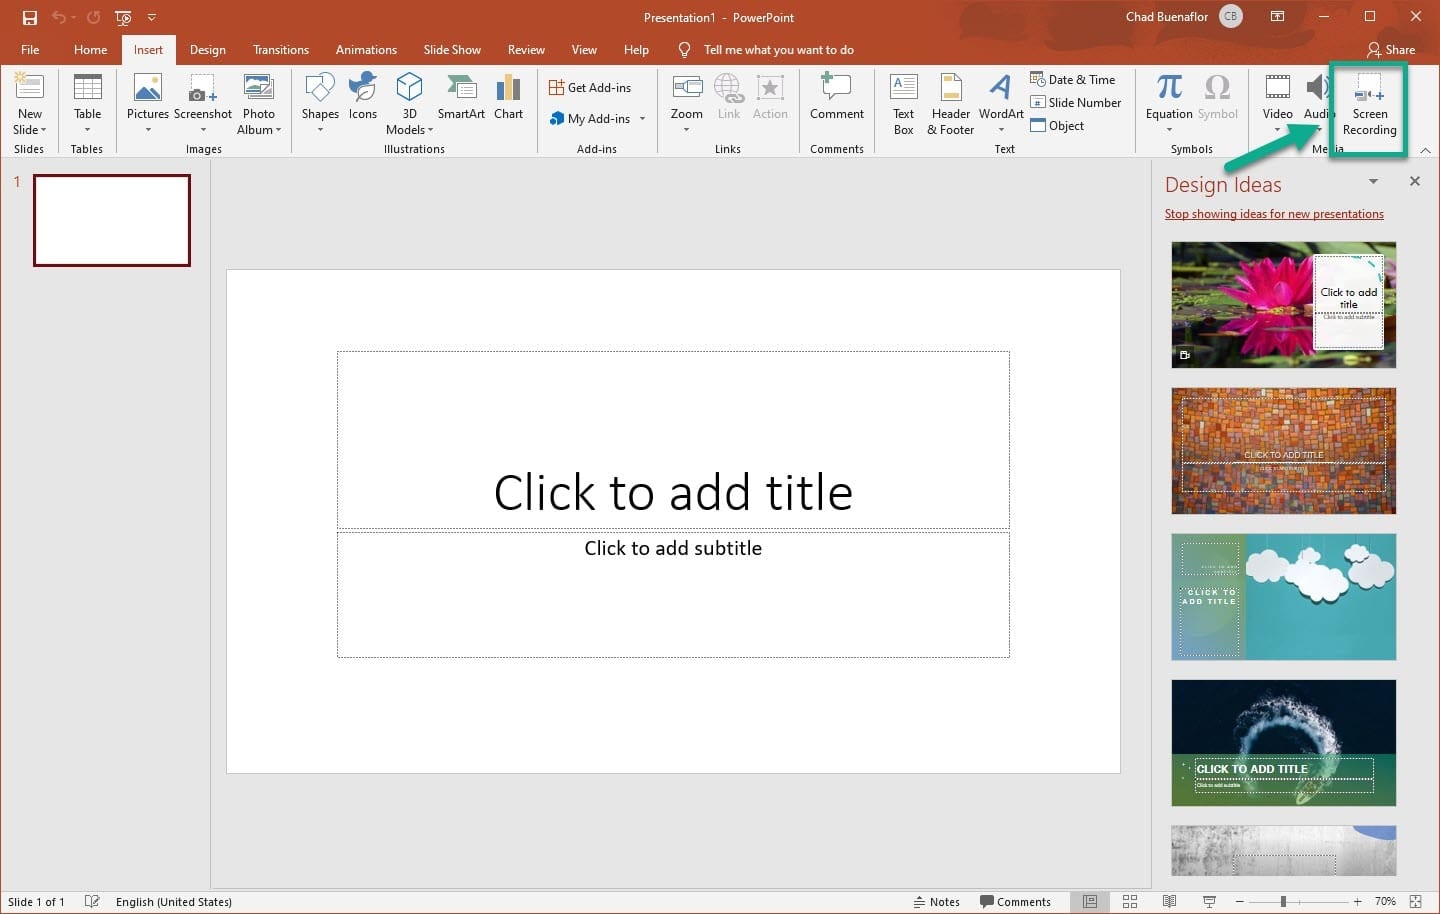
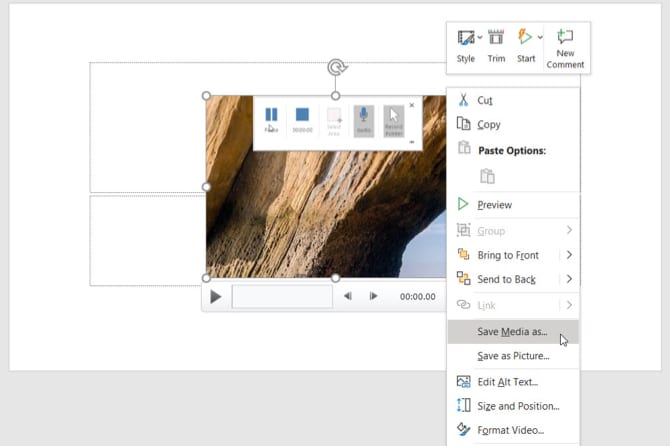
Therefore, in this article, we have decided to share the best method to record Windows 10 screen using Microsoft Powerpoint. The screen recording feature is present in the latest version of Microsoft Powerpoint. So, let’s check out how to record your screen with Microsoft Powerpoint. Step 1. First of all, open the Start menu and search for Powerpoint. Step 2. Open Powerpoint and click on a blank presentation. Step 3. On the next step, you need to select the slide from the left pane. Step 4. Once done, click on the ‘Insert’ tab. Step 5. Now you need to find the ‘Screen Recording’ button. Step 6. Once done, you will see a panel like this. Click on the ‘Select area’ to record a selected area. Step 7. To start the recording, click on the ‘Record’ button. Step 8. Once done, click on the ‘Stop’ button. To save the recording, right-click on the recording and choose the ‘Save Media As’ button. Step 9. On the next dialog box that opens up, choose the name and file location, and click on the ‘Save’ button. That’s it! You are done. This is how you can record your screen on Windows 10. So, this article is all about how to record your screen with Microsoft Powerpoint in 2020. I hope this article helped you! Share it with your friends also.
