Whatever the reasons, you can easily record your iOS 11 Screen in easy steps. The good thing is that you don’t need to install any third-party app to record the screen activity.
Steps to Record Screen With Audio On iOS 11
The native screen recorder of iOS 11 can be used for this purpose, recording the screen with sound. So, continue reading the guide if you want to record a screen with Audio on iOS 11. Below, we have shared some easy steps to record screen with Audio on iOS 11. Let’s get started.
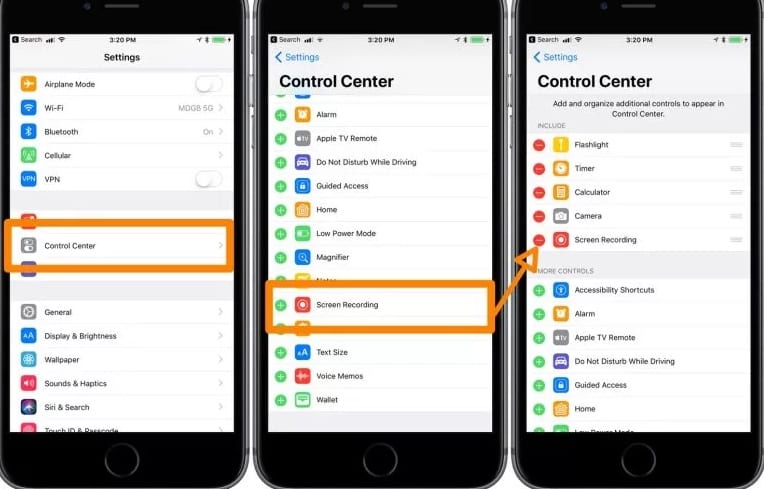
First, go to the device settings in iOS and tap on the Control Center option. Select the option named Customize Controls and then look for Screen Recording. Tap on the plus icon in green color beside the Screen recording. The screen recorder will be added to the control center on your iOS device.
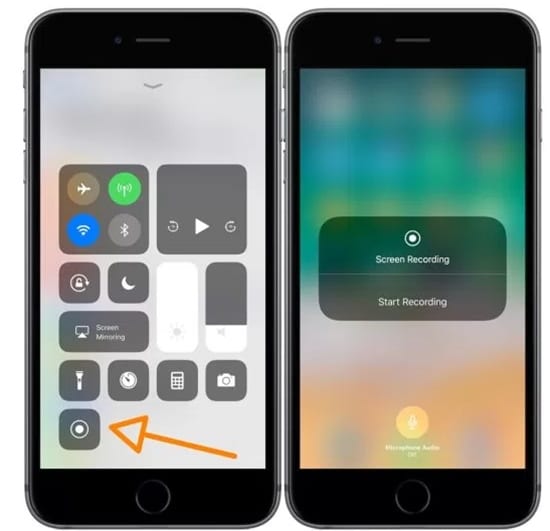
Once you have performed the above actions and made all the preferences in the iOS device, you now have to go to the screen where you wish to start recording the display. Simply pull the control center above on the screen, look for the record icon or the tile, and tap on it. This would show you the options for recording the screen; microphone switch on/off, etc. Just choose the one of your preference and then go ahead with the same.
To stop the screen recording, pull the control center and tap on the recorder icon again. This could also be done through the red-colored status bar where the recording or the stop icon is placed.
The saved recording would be placed in the camera roll inside the photos app so you could anytime access all of your screen recordings made by the above process. So, these are some simple steps to record screen with Audio on iOS 11. If you need more help recording the iPhone screen, let us know in the comment box below.

