On Windows 10, you don’t need to install screen recording software to record your screen. A built-in feature allows you to record your entire Windows 10 screen-free. Not only that, but you can also use VLC Media Player to record your desktop screen in easy steps. So, if you are looking for ways to record screens in Windows 10 without installing any software, you are reading the right guide.
Best Ways to Record Record Screen In Windows 10/11
Below, we have shared the two best ways to record screen in Windows 10/11. Both of the methods were free and require no additional app installation. So, let’s get started.
Record Windows 10 screen via Game Bar
Xbox Game bar is a gaming feature of Windows 10 that provides you an option to record your screen. While the feature is designed to record gameplay videos, it can also record your desktop screen. Here’s how to record the screen via the Xbox Game bar.
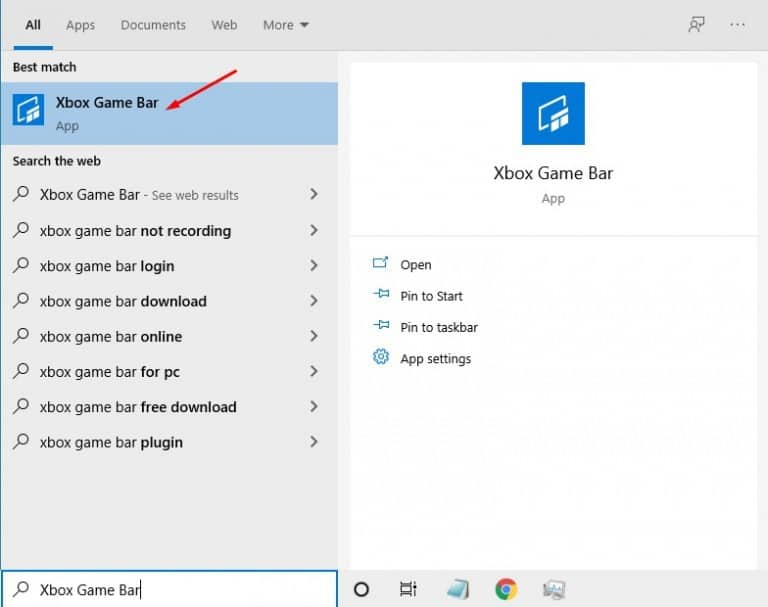
First, in your Windows 10, click on the Start button and type Xbox. Next, open the Xbox Game Bar app.
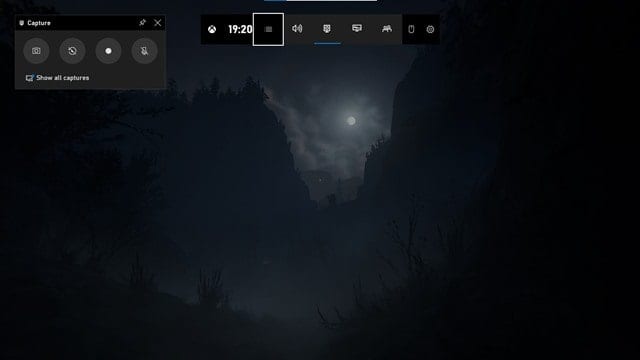
Now, you have to press Windows Key + G button on the screen you want to record.
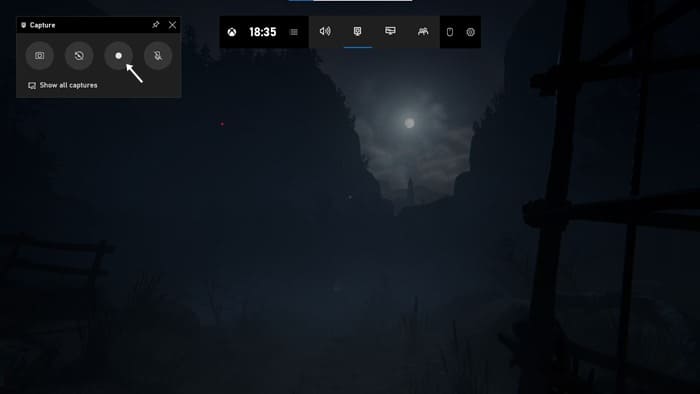
Now, you will see many options. You need to click on the Recording button on the Capture widget. This will start the screen recording.
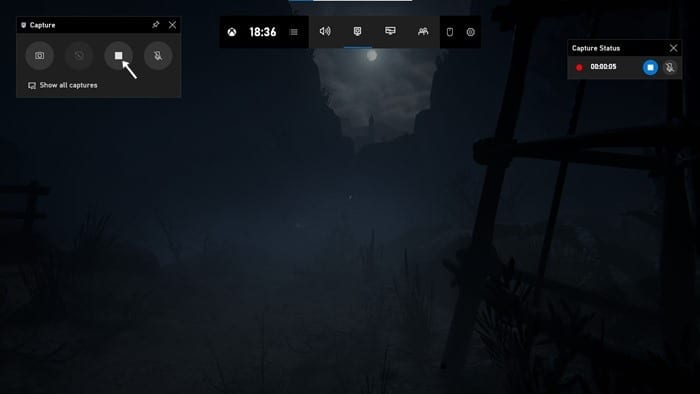
To stop the screen recording, click on the Stop button on the same widget.
By default, all your recordings get saved to the folder “C/Users/Videos/Captures“. That’s it! You can easily record the screen with the Xbox Game bar on Windows 10. You can also capture screenshots with the same tool.
Using VLC Media Player
With the VLC Media player, you can record the screen easily. You can use this method in Windows 7, 8, 10, and even Windows 11. Here’s how to record your Windows 10 screen using VLC Media Player.
First, download and install VLC Media Player on your Windows computer if you don’t have one.
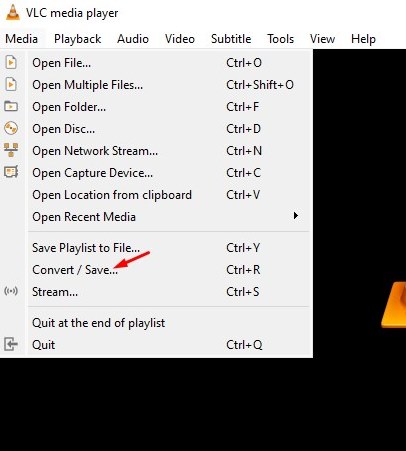
Next, click on the Media tab and select the Convert / Save option.
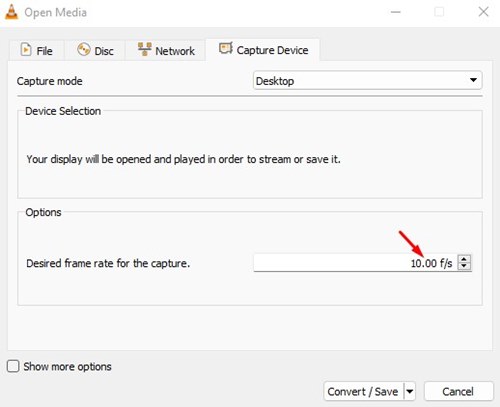
Now switch to the Capture Device and select Desktop on the Capture mode.
On the Desired frame rate for the capture, set your desired frame rate. 10f/s is recommended.
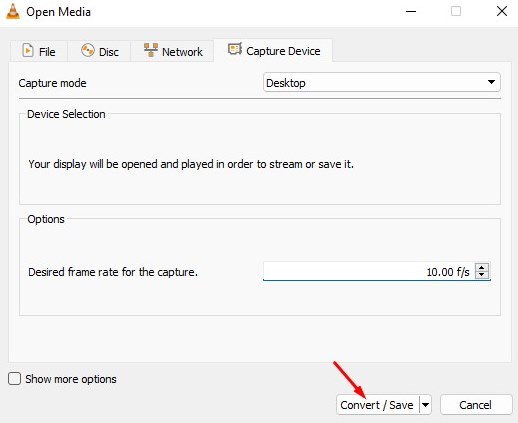
Once done, click on the Convert / Save button at the bottom of the Window.
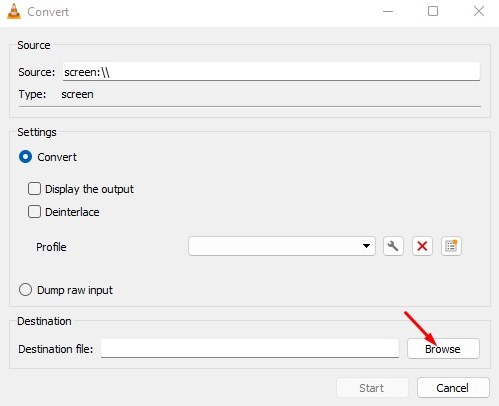
On the Convert Window, click the browse button, select the filename, and set the location.
Once done, click on the Start button.
That’s it! You are done. Now the screen recording will start. You can now control the screen recording from the VLC’s interface. That’s it! You are done. This VLC media player method works with every Windows version. You don’t need any additional software to record your desktop screen. So, this is all about Windows 10 screen recording. We have shared the two best methods to record Windows 10 screen. If you don’t want to go through all hassle and want a straightforward way to record Windows 10 screen, you need to check our article Best Screen Recording Software.