Pinning specific settings to Windows 10 Start Menu could come in handy if you frequently use an item that’s hidden deep under the Settings. By Pinning items to the Start Menu, you no longer need to open the System page to access the most used settings. Also Read: How To Hide Windows 10 Start Button
Steps to Pin Your Favorite Settings to Windows 10 Start Menu
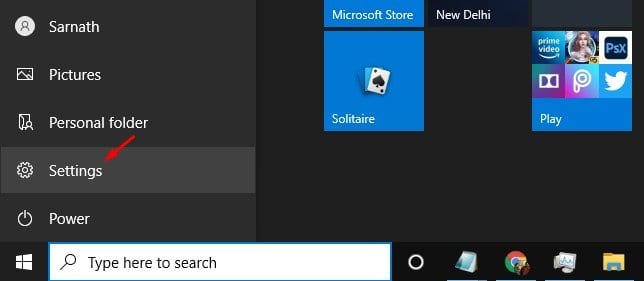
You can even pin the Classic Control Panel to the Windows 10 start menu as well. This article will share a detailed guide on how to pin specific settings to Windows 10 start menu. Let’s check out. Step 1. First of all, click on the Start button and click on the ‘Settings.’
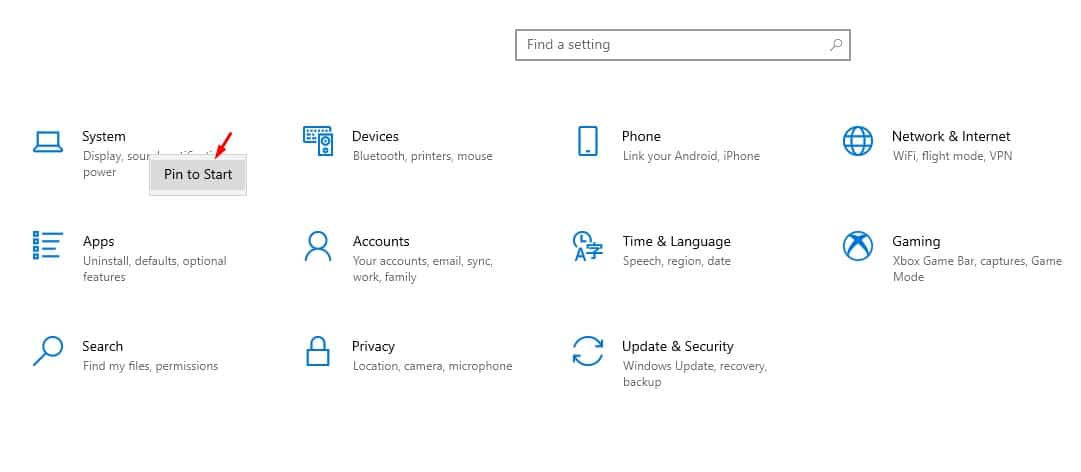
Step 2. You can pin any item displayed on the Settings page to the Start menu. For that, right-click on any of the section and select the ‘Pin to Start’ option.
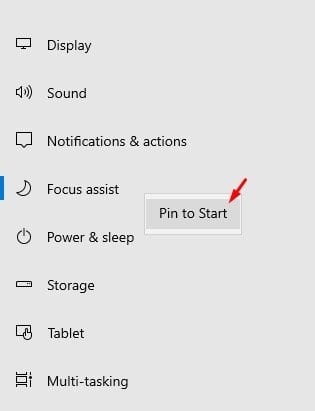
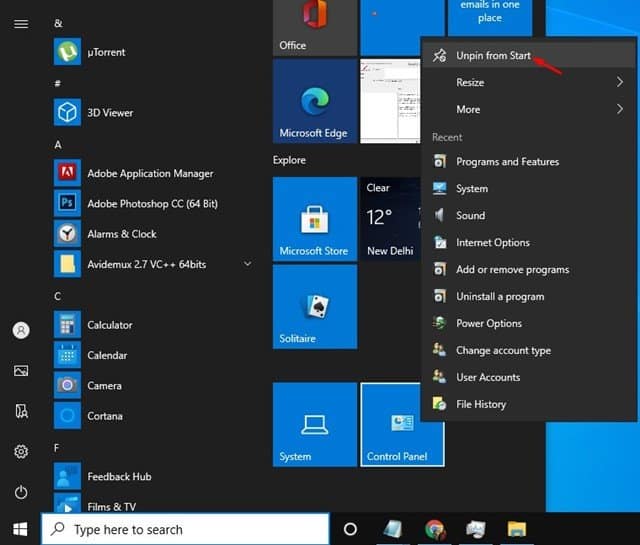
Step 3. The Pinned item will appear in the Start menu. If you wish to remove the pinned item, right-click on it and select ‘Unpin from Start’ Step 4. You can even pin specific settings to the Start menu like Focus Assist, Storage, etc. For that, click on the particular section and select ‘Pin to Start’
Step 5. After pinning an item, you will see a confirmation dialog box. Click on the ‘Yes’ button.
Step 6. If you are using the latest Windows 10, you might find it difficult to access the Control Panel. So, it does make sense to pin the control panel to the Start menu. For that, search for ‘Control Panel’ on the Windows search. Right-click on the Control Panel and select ‘Pin to Start’
Step 7. You can pin as many settings as you want in the Windows 10 Start Menu. To unpin an item, just right click on the pinned item and select ‘Unpin from the start.’
That’s it! You are done. This is how you can pin specific settings to Windows 10 start menu. So, this article is all about how to pin specific settings to the Windows 10 Start menu. I hope this article helped you! Please share it with your friends also. If you have any doubts related to this, let us know in the comment box below.


