If you are using the preview build of Windows 11, you might know that Microsoft has made few changes to the user account settings. On Windows 11 home, you need to be connected to the internet to create a new user account. Windows 11 Pro, on the other hand, gives you more options to create local user accounts. So, if you are looking for ways to add a local user account on Windows 11, you are reading the right article. Also read: How to Install Windows 11 From USB
Steps to Add a Local User Account On Windows 11 (Full Guide)
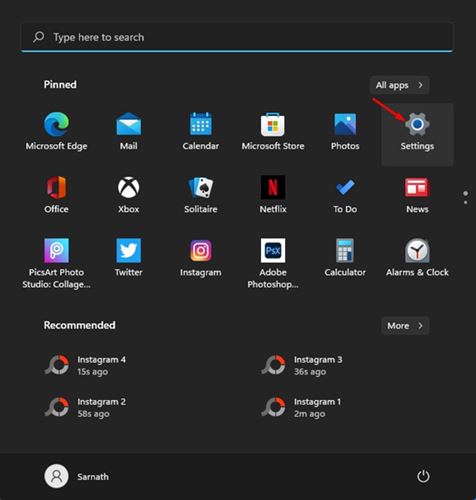
In this article, we will share a step-by-step guide on adding a local user account to Windows 11 operating system. The process will be straightforward; you need to follow some of the simple steps given below. Step 1. First of all, click on the Windows 11 Start button and select ‘Settings.’
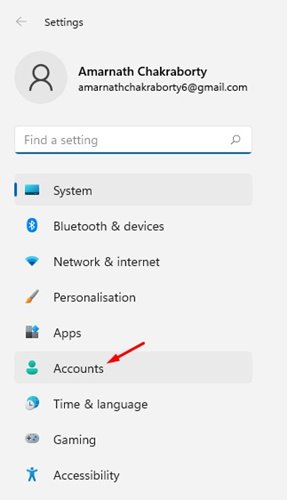
Step 2. On the Settings page, click on the ‘Accounts‘ option. The Accounts option is located in the left pane of the screen.
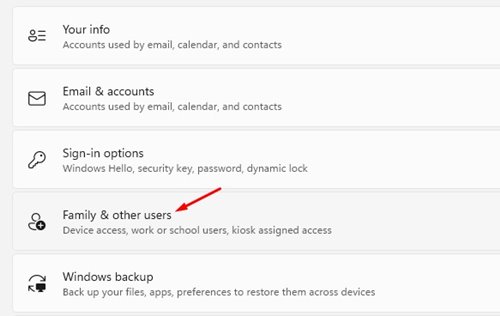
Step 3. On the right pane, click on the ‘Family & other users’ option.
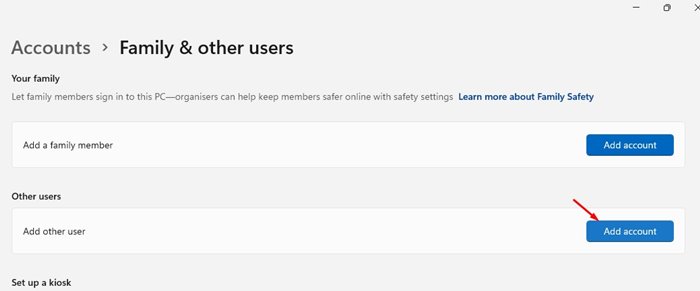
Step 4. On the next page, click on the ‘Add Account’ button behind Add other user.
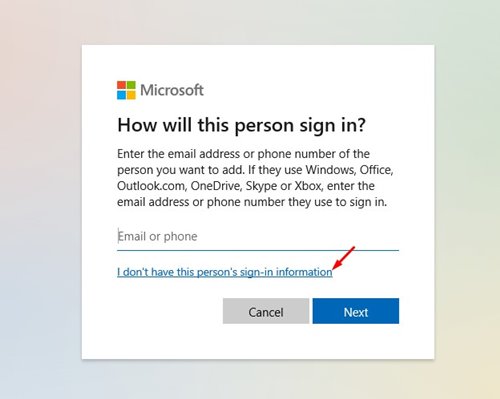
Step 5. Click on the ‘I don’t have this person’s sign-in information’ link on the next page.
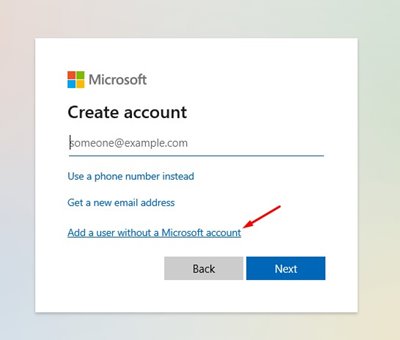
Step 6. Click on the ‘Add a user without a Microsoft Account’ link on the Microsoft Account creation page.
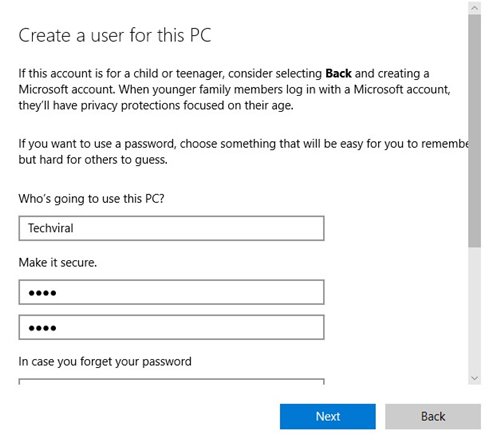
Step 7. You need to enter the user information for a local account on the next page. Enter the username, password, password hint, and click on the ‘Next‘ button.
Step 8. The account will be created. To remove the account, click on the ‘Remove‘ button behind the local account.
That’s it! You are done. This is how you can add a local user account on Windows 11. So, this guide is all about how to add a local user account on Windows 11. I hope this article helped you! Please share it with your friends also. If you have any doubts related to this, let us know in the comment box below.
